A Mortise and Tendon Joint
This is the last of a series of articles about my left ankle. To see other entries in the series, scroll down in the blog to see the “Ankle” entries. The first one is “Falling.” If you are just here for the Puzzle, you will find it at the end of this article.
From lifelong conditioning, when I think of surgeries, I think of masked and gloved figures, muttering the names of specialized utensils as they huddle around a sleeping patient. In the background there is an assortment of beeping, hissing machinery. A mercilessly bright overhead light throws everything into a literally sterile relief.
This is still a valid image, as far as it goes, but for many contemporary surgeries, including the ankle replacement that I recently underwent, my mental image has been missing a crucial component: a machine shop. We are talking drill press, plunge router, oscillating saw, the works, plus an assortment of jigs, clamps, and drivers that any shipwright might envy. All of these things have been loaded into operating theaters, thanks to the engineers and surgeons who have come up with tools, techniques, and parts to meet a powerful demand for aftermarket joint repairs and upgrades. We are talking actual joinery here, at a level of refinement that one would expect to find at a Port Townsend shipyard, but with scrubs instead of Carhart’s.
I was recently the beneficiary of this machinery, courtesy of the UW Ankle Clinic in Seattle. What follows is an interested layperson’s look at the technology.
I’ll start by saying that total knee and hip replacements are now so common that they almost seem mandatory for Baby Boomers; according to the Mayo Clinic, over a million hips and knees are installed every year. Prosthetic ankles, though, are still something of a rarity (fewer than 5,000 per year), as a relatively small surface area and relatively high, complex stresses have until recently made it a challenge to produce durable joints. Because of this, surgeons used to install ankles grudgingly, and only if they could be assured that you were a particularly lethargic couch potato, preferably of an advanced age, so there would be little chance that you might actually use your new ankle for anything more strenuous than toe-tapping.
But hardware design has evolved at a steady pace (meaning that engineers learned from catastrophic design failures), and surgeons have now had opportunity to hone their skills (meaning they have learned from catastrophic technique failures), so total ankle arthroplasty (meaning, well, you’ll see) is now an option for even relatively active old farts such as myself.
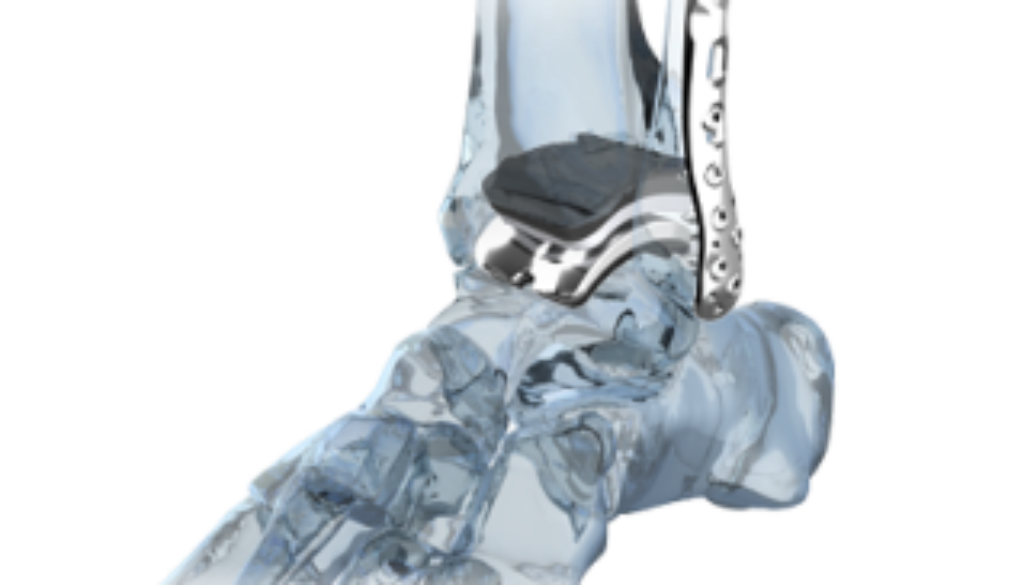
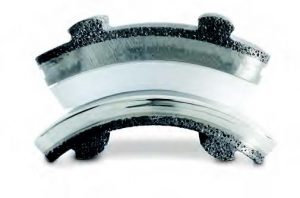
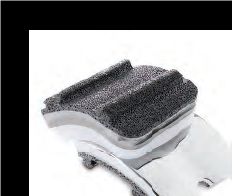
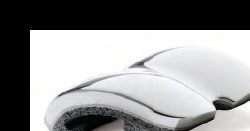
Contemporary prosthetic joints aren’t much to look at (figures 1 through 3) – just a pair of curved metal pieces, with polymer liners – but their precise configuration, including the transverse tenons across their backs, their exact curves, and the pitted surface texture, all serve to make the joint more functional and durable. This joint is the work of Zimmer-Biomet, and as you will see, the artfulness of the joint’s design is just one of the things they do well.
About that texture: In the process of healing, new bone will grow into the surface, creating a solid bond. The FDA requires that adhesive also be injected into some of the gaps between bone and hardware, and my surgeons complied with this requirement, but with a distinct air of amused tolerance for a pointless government mandate. Their belief is that porosity alone makes glue needlessly redundant. On the one hand I can understand their confidence that bone and steel will become inextricably interlinked. On the other hand, this is definitely a place where I appreciate the presence of a belt as well as suspenders, and I would not object to staples, throughbolts, and Velcro too, if it made the joint more durable.
As you can see, the pieces of this new joint are elegantly shaped, but they aren’t particularly complex pieces of work; the real challenge is how to install them into a living human being, and that is where the machine shop comes in.
the bones.
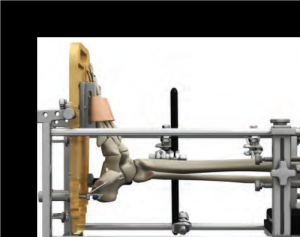
The first machine shop component is a sort of jig, into which the patient’s leg and foot are clamped (figure 4). Well, not just clamped; the tibia is actually screwed to one of the longitudinal members of the jig. With the work fixed in place, the surgeons get to do a little old-school work, making a long incision, and pulling the two sides of the incision apart like a set of theater curtains. I will not show you what that looks like, given how squeamish some people have been about the relatively pleasant appearance of the X-rays and skeletal images shown here.
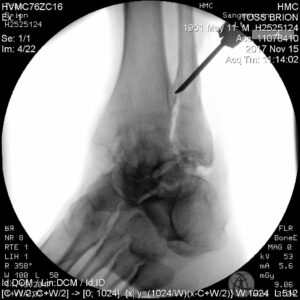
The surgeons approach the work from the outboard side. This gives the best option for machining, and gives blood vessels and nerve bundles a relatively wide berth. The fibula (the smaller of the two lower leg bones, located on the outboard side of your leg) is in the way, so the next step is to sever it a short distance above the ankle (figure 5), and then fold it down out of the way, to allow access to the ankle joint. I added those italics because, ignorant of the details of surgical procedures as I was/am, I’d never thought that the work could be so mechanical. Literally mechanical, like how you would pull a clevis pin to get at a winch’s gear cluster, or cut a hole in a ship’s hull or deck to replace an engine.
With the fibula out of the way, a drilling/milling jig on guide bars is slid into place next to the foot, and a series of holes is drilled on the talar (lower) and tibial (upper) sides of the ankle joint (figure 6). These holes are laid out on a centroid curve (relative to the ankle’s anatomic center of rotation). In other words, we are preparing a path that mimics the original joint’s path of travel. These holes are then enlarged, using a larger drill bit in the same jig, a process that will be familiar to any shipwright or machinist. The smaller drill bits allow precise arcs, and the larger bits remove most of the bone between the holes.
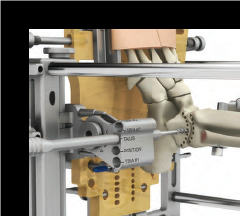
The drill bit is then replaced with a milling bit, and the remaining material in drilled area is milled away (7), leaving an arced slot where the ankle joint used to be. The depth of the drilled and milled holes is carefully set. I have done this with a piece of tape wrapped around the shaft of the bit, as a visual do-not-exceed depth mark. The surgeons probably used something fussier…
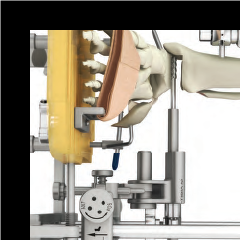
Once the slot is made, more milling ensues, creating transverse mortises to accommodate the prosthetic’s tenons, plus channels into which adhesive can be pumped. When all is fair, the hardware is inserted (figure 8).
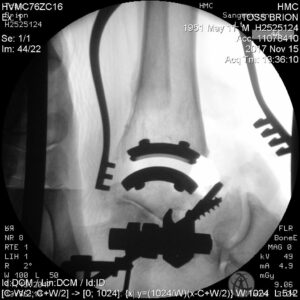
Once the hardware is in, it is time for reassembly, starting with flipping that fibula back into place, then screwing a sister frame alongside, to reinforce the joint (figure 9). Hardware taken care of, the rest of the operation is a matter of easing that flesh curtain back into place, and stitching the sides together. This is a reversion to traditional surgery, using actual needles and thread, but even here there is some degree of innovation. Specifically, the stitches that surgeons use to close wounds have changed, with some variation on a “Mattress Stitch” favored, as it provides a smoother, stronger closure than previous configurations (figure 10).
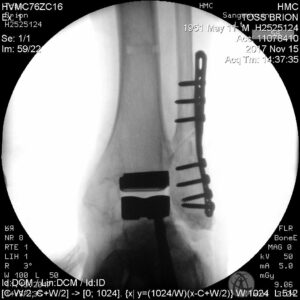

As of this writing, the stitches have been removed, and the incision is almost entirely healed, but it will be another month or so before I can put more than half my body weight on the new ankle; it takes time for bone to grow into that pumice-like surface, time for the fibula to mend, time for circulation and nerve function to return to normal. Basically I’ve spent most of the last six weeks supine, with foot elevated, trying not to go batty from inactivity. But while my conscious mind has been restless, the deeper parts of me have been stolidly, unceasingly, molecule-by-molecule repairing a relatively serious wound. The parts of me that are doing the work don’t know that this was careful surgery, done for my improvement. All they know is that I have suffered an injury, and they have marshaled all of my body’s resources to address that injury, working with a precision and skill that makes the surgeons – as I am sure they would readily admit – look like somewhat dim apprentices.
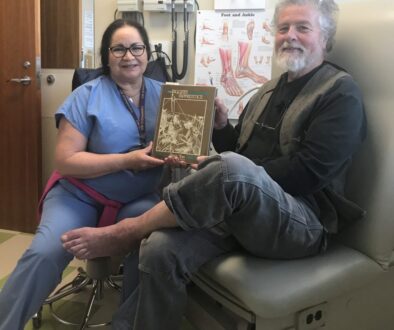
Note: The X-rays in this piece are of my ankle. Unless otherwise noted, the illustrations are from Zimmer, the manufacturers of the hardware, and of the machinery used to install it. For a much more detailed description of the procedure, see – http://www.zimmer.com/content/dam/zimmer-web/documents/en-US/pdf/surgical-techniques/foot-and-ankle/zimmer-trabecular-metal-total-ankle-surgical-technique.pdf. Many thanks to Dr. Sangeorzan and the entire team of careful, competent, friendly people who made it all happen.
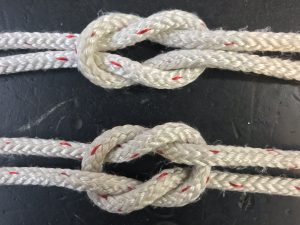
And now for this week’s Fabulous Puzzle. In the picture below are what appear to be two knots, but since you can’t see the ends, a quirk of topology means that there might be any of four knots represented. All of the knots are bends (knots which join two ropes together), so there is an end and a standing part on each side of each knot.
If you can identify two of the possible knots, your entry will qualify you for a drawing to win one of our DVD’s.
If you can identify three of the possible knots, your entry will qualify you for a drawing to win one of our Point Hudson Fids, good for up to 5/8″ rope.
And if you can identify all four possible knots, you will qualify you for a drawing to win a personalized autographed copy of the new edition of the Rigger’s Apprentice.
If you win, and already own any or all of the above prizes, we will work out a prize of equivalent value for you.
To see these items and more, visit our online store, on this site.
As always, we welcome any and all additional rope geek information on the names, characteristics, history, etc. of the puzzle topics. We also welcome suggestions for future puzzles!
Send your entries to puzzle@briontoss.com before noon on the 10th of January. We will draw random winners from the pool of correct entries, and announce them on Friday, the 12th of January.
